Monday, September 3, 2007

Organized Living

I had a major setback in my crafting endeavors this summer when my entire craft shelf came tumbling down one day out of the blue. I think it just got a little too overburdened (wonder why?). Turns out that it really had not been put up in the way it should of have been for what it was going to hold. So for a while, my kitchen table looked like this...

After I got tired of the complaints, I went to Home Depot and bought some 50 lb wall anchors and rebuilt the entire unit. The result is definitely better and I don't think anything short of my children collectively swinging on it would bring it down again (I hope!)

This mess actually gave me a chance to rethink how I wanted to organized my "stuff". To anyone but me, it always looked cluttered and disorganized, though I usually could find what I wanted (although not always when I wanted it). Anyway, I went shopping for containers and other things to help me make sense of my supplies. I ended up putting all my acrylic paints in two plastic containers from Walmart. I found a tip somewhere online about storing paints upside-down to keep them fresher and have found that it does make a difference. I also put all my painting tools in trays on the same shelf, so everything is ready to use. Glues, sealers, fillers, tape, sprays, are all grouped together and have a place.

Next were my jumbled up craft drawers. A couple of years ago my husband bought me four Rubbermaid stackable drawers for my crafts. Shortly after that, he went out and bought four more. The drawers have always be stuffed and at one point were generally organized (fabrics, yarns, etc.). After fixing the shelves, I decided to tackle the drawers next, one by one. I pulled everything out, cleaned the drawers and decided what would be going back in and what needed to just go.

I realized that I had a lot of stuff I had forgotten about and still would like to use. I put all my collected patterns, stencils, sketches, etc. in a stack and eventually put them in a expandable file folder. Fabric was neatly folded and put back. I used more plastic containers and put related notions in the same drawers (ie. pins, needles, buttons, etc. went in the fabric drawer). I even had a drawer for works in progress which I put in separate grocery bags. If ever I want something to do, I can pull out one of the bags and have at it.

There's a drawer for glassware (like mason jars I use for Cookies in a Jar) and a drawer for tools (like my glue guns, wood burner, sandpaper, etc...) I also made a box for craft supplies I didn't want anymore and plan to drop that off at Goodwill sometime soon. Not as full as it could have been....

I haven't solved everything yet. I decided to keep the drawers looking somewhat organized, most of the knitting supplies had to come out for now, including the yarn. I don't have a huge stash like some people might, but enough to make a big tangle if I'm not careful. The knitting needles will probably return to the tool drawer, but I want to figure out how to organize them (by size and type). I may put the straight needles in a vase again (like I've done in the past), which can be cute. As for the yarn, I read about someone who used a closet door shoe organizer, and I'm planning to try it. I have the organizer and as soon as I have it up with yarn in it, I'll post a picture.

So, even though I haven't posted recently, I've been busy! I have more projects to update everyone on, so check back. I finished the book purse, which looks great (smells a little too much like glue though--any suggestions?)! I also have finished my Harry Potter hats and a few other things. Still have lots "in progress" though!

Thursday, July 19, 2007

Charmed Knits Crafts

It's been another long drought on the blog...sorry. I took one of my little ones out of town for some scheduled surgery. She's doing fine, so I'm back to posting!

I have been helping organize a Charmed Knits for Charity event in my area and am starting to get excited. I'm a big Harry Potter fan and while I've been "rereading" the books on audio cd, I've been knitting for the KAL and working on other stuff for the big day. Namely, I've made Gryffindor robes and wands for myself and my older daughter, made spellbook knitting cases for us, made up some potions and magical props for decoration, and last night made a pair of Golden Snitch knitting needles for decoration.

The needles were a last minute inspiration and I'm really proud of them. They're not totally done yet. I need to work on the wings a little more and then finish the rest of the needle body so they are usable. These may end up on Etsy after the event if I decide I can part with them.

On another note, I've been inspired to finally create a book purse. I've been reading about them for a while, but hadn't ventured forth yet. I made it a little harder though, since I'm very picky and wanted it to be something I'd actually be willing to use. Since I didn't want to cut up any of my favorite books, I took an old college text book and "retitled" it "Black Beauty". This first one is my experiment and I think I'm going to give it to a friend's daughter who is really into horses. I found some straps that are sort of like horse reins or a bridle, and I'm trying to figure out how to add a zipper closure. Again, it's not perfect, but for a first attempt, I'm pleased. Here's two pictures and I'll post more pictures and details when I get it done.

The thing I like best is that it looks like this is an original copy of Black Beauty and not the boring and dog ugly book I started with.

Wednesday, July 4, 2007

Hats and Handbags

I can knit, and I can blog, but I have to get better at doing both at the same time *smile*. I started another drop stitch scarf with Lion Brand Incredible yarn in Copper Penny. It's really coming out nicely and I'll post a picture soon.

I got going on my Gryffindor hats for the Charmed Knits knit-along FINALLY! I finished the first hat and started the second today. I decided to spice things up a bit and put in little cables on a K2, P2 ribbing. It looks pretty good, but I hope it'll stay on a head well. We'll see!

I've spent a lot of time lately thinking about writing patterns. I've made up some patterns and modified plenty, but have never typed up one for anyone else's use, so... I've been working on some felt purse patterns. I love felting and I have a little crocheted wrist bag I use for carrying knitting sometime (pattern here). I like it, but wanted to see if I could make a knit and felted version. I also wanted to do it all in one piece (little or no sewing). After some trial and error, I finally came up with something that worked and looked good! I just have to give it a little shave (it got a little hairy in the wash) and put the lining in and it'll be done.

I decided to call it the Lil' Kipper because that's what I'll use it for (carrying my knitting around places). I need to finish typing up the pattern and will knit another bag following my written directions to make sure I didn't leave anything out. When that's done, I'll put it out there. I'm planning to add a patterns section to this blog soon. Some will be free, but I'll have a couple that will be for sale. Might be a while before I get it all up and going though.

Friday, June 22, 2007

Hard at Work...Crafty Work That Is

It seems I've gotten on a roll and have managed to carve out more time than usual to work on unfinished projects. For instance, the drop stitch scarf is done! After months of languishing in a bag, then being "completed" but having an untimely accident in the finishing process, it really looks rather good. I decided not to add a fringe, since the yarn snags so easily anyway. I love the pattern I ended up using and will definitely do more in different yarns. Whoo hoo!

So, next on my list was the Mother Bear Project bear and I added a good 7 or 8 inches to that last night. I've done a few of these, enough to want to take liberties and push my creativity, so this one is going to be a hula dancing polar bear... don't laugh, I'm serious. Pics to come soon. I'm still looking for the sock pattern, so that left my recycled sweater purse needing some attention.

I was inspired by a tutorial on ChicKnits and started this project over my spring break. I was at Goodwill looking for some old jeans and sweatshirts to take on an outdoor trip and found two very nice looking 100% wool sweaters for $2 each. Unfortunately, I wasn't thinking ahead and have no photos of the unfelted sweaters. Basically, I machine washed them to oblivion until they were densely felted and then put them in the dryer. Ouch! Next, I cut the sweaters apart at the seams, removed the arms, and spread everything out to see how much felted material I had to work with. Working with the first sweater, I cut out some templates on poster board in the shape I wanted for the purse and traced those in marker on the sweaters. I love the colors of this sweater, but needed to be careful because of the stripe pattern (matching up the front and back of the purse). Next, I pinned the two pieces inside out and sewed on three sides with my sewing machine. Unfortunately, on one side I got a little careless and did not watch my stripes, so there a jog, but I think it won't be that noticeable. I'll definitely watch for this in the future. So here's what I have so far. The tabs sticking up will be sewn down for purse strap loops.

So, this is where I picked up this morning. I've been thinking about the straps for a while and decided to do black i-cord, but I was also unhappy with the edge of the purse. It had an unfinished look to it that I didn't think would improve without work. If you look at the tabs, you see what I mean. I decided that a nice single crocheted edge in black would help , so I used a tool to push holes through the felt as I crocheted the border.


I think it looks pretty good and will felt the edge by hand using some hot soapy water. I have to get started on the i-cord straps next. Not sure of what length I want yet, but will play it by ear. The finished purse will have a black lining and magnetic snap. I've used these great tutorials on Hello Knitty.com (Purse lining tutorial--PDF and Magnetic snap tutorial--PDF) in the past to learn how to do this. I will post more purse pictures as I work.

Wednesday, June 20, 2007

New Beginnings

A new day, a new start on the drop stitch scarf. Trying to put the horrendous catastrophe of the scarf behind me, I chose this pattern from my wish list and cast on today. The picture of the finished scarf is gorgeous!

So far so good! I think I like the look better anyway. I tried this pattern back in December with some ribbon yarn, but frogged it, not because of the pattern, but because I had trouble with the yarn. It was a ladder yarn and my needles kept getting caught in wrong places. My only trouble with this yarn is that the nylon content keeps snagging on my embarrassingly rough hands. I suppose that's my cue to get some better lotion or use more of it...

Tuesday, June 19, 2007

Drop Stitch Gone Horribly Wrong

Today was a sad day, but it started really well. I finished my Hufflepuff hat last night and was on my way to finishing the drop stitch scarf ("Magic Scarf") this evening. Two projects done in two days! That almost never happens. The scarf is for charity too (I rarely keep anything I knit) and will be part of our fall fundraiser for Stitch for a Cause. Now, I've never done a drop stitch scarf but have been eager to try this pattern. I thought I followed everything to the "t" and it looked pretty good after I had cast off. You can see the stitches on the left starting to run down the length of the scarf (as they are supposed to).

Now, the first problem I had was that at the second to last row, I was supposed to purl a stitch then drop the next. This was little freaky, but it went fine until the end of the row. I was supposed to be left with 21 stitches, but found I had 22. I decided to knit the last two together and bind off on the next row according to the pattern. Didn't seem like a big deal. I would have a row next to the edge that wouldn't drop, but I didn't think it would be very noticeable. As I started to pull my scarf lengthwise, you can see the dropped stitches running just like they should.

Then things started to go wrong...really wrong. In a few spots, I got big loops of yarn that seemed knitted o.k., but were just REALLY loose. I figured I had just knit a stitch too loosely. As I continued to pull on the scarf and use my fingers to help the dropped stitches, it looked very pretty, but I noticed some of the other rows that were not supposed to drop, starting to come loose. Ahh! What was happening? So I stopped pulling and laid it on the table again. This is what I had.

I felt sick. All I could do at this point was frog the whole thing. I am planning to knit the scarf again, but may use a different drop stitch pattern. I'm sure it was something I did wrong in first rows, but since I'm not sure what... Part of my problem came from working with a slippery yarn, so the next time I try it, I'll try a different yarn. In the meanwhile, I'll go back to knitting more hats...sniff...

Sunday, June 17, 2007

Finally...Yarn for a Gryffindor Hat

I stopped by Hancock Fabrics today and they had just the colors I needed for my Gryffindor hat for the Charmed Knits KAL. Finally! I also found a better (brighter) yellow for my Hufflepuff hats and a pretty purple sock yarn on clearance (color didn't photograph well on that one).

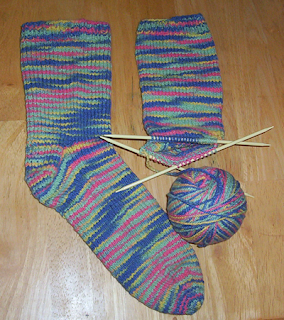
I am not a sock knitting fan and keep wondering if I'm missing something when I look at all the blogs and patterns out there, but I'm willing to give it another shot. If I don't find a pattern I can get into, I find that sock yarn makes very cute self-striping baby hats also. *smile* I have an unfinished pair of socks I started last year that I dug out today. One sock is finished and the other is about half done. I would have worked on it today, but I can't find the pattern...oops! If I can't track it down in a few days, I'll talk to my friend who owns the yarn shop where I bought the yarn. The pattern was free with the purchase, so I'm sure they have more copies.

Friday, June 15, 2007

Hufflepuff Baby Hat


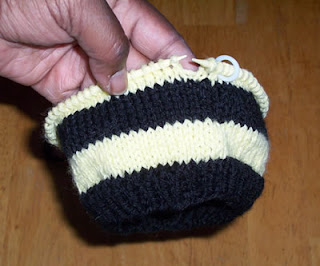
So, I've been working on Hogwarts hats for the Charmed Knits KAL. This is my eighth one, a little Hufflepuff baby hat. It's rather a pale yellow, but oh well. I've had to be budget-minded lately and got some Wool Ease on sale, but the choices were pretty limited. These hats are super simple, which makes for great mindless knitting (when you want busy hands but not a busy brain). I'm so used to working on hats for little heads with my charity knitting, that I scaled down the size a little from the pattern. I'll do some bigger ones when I increase my yarn stash.


Here's a look at the inside. Do many of you carry the yarn for stripes along this way? Is there a better way, short of cutting it off and weaving in each bit? I've tried twisting it every three rows instead of only at the color change, but I didn't like it any better. I'm happy with the jog technique I'm using (knit row in new color, slip first stitch in row 2, knit normally until next change). It only looks a little funny on the hats with the narrow stripes (two rows). I will have to investigate other jog options.

I've got to find a box so I can get these all in the mail this weekend. I've wanted to do a Gryffindor hat from the start, but I can never find the right colors when I'm looking for them. I've got the scarlet now and just need to get the gold.

Saturday, June 9, 2007

My First Squidoo Lens--Knitting Needle How-to


I've long been a fan of Squidoo and just created my first lens! Check it out: Make Handmade Knitting Needles With Jewelry Beads.

It's kind of long, but I wanted my directions to be thorough. I will post a picture of the finished pair of needles as soon as I can. One bead jumped out of my hand and rolled away, so that's why there is only a picture of one finished needle *smile*. Oh well...

I first ran across Squidoo with this lens on Making Fairy Wings. I made my daughter a set of Painted Lady Butterfly Wings for her Halloween costume last year. They came out well and got lots of compliments.

Thursday, June 7, 2007

Under Construction...

Welcome to my blog! I am still planning and setting things up, but hopefully will be posting regularly before long. Thanks for reading!